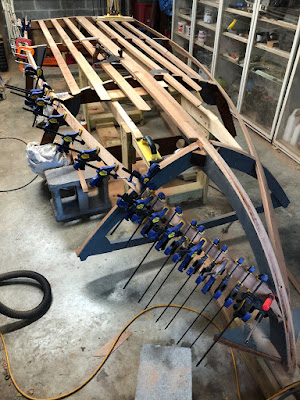
This basically involves 3 steps:
- Cutting one end to fit at the stem
- Planning the placement of the scarf joints
- Preparing the scarf joints
1. Cutting one end to fit at the stem
After a little testing with some paper-thin wood templates, I found that the angle at the front tip of the chine was almost exactly 60°. Easy enough to cut.
Then, with a little trial and error, I cut the bevel so that the tip of the chine would fit against the stem as best possible.
Just as with the first lamination, what I have to work with are 4 strips of mahogany approximately 3/8" thick x 2" wide, and a little over 4 feet long.
The three scarf joints on the first lamination lie between Frame #5-1/2 and Frame #4 (about halfway); between Frame #4 and Frame #2 (again, about halfway), and between Frame #2 and the Transom, approximately 16" forward of the transom. (These locations correspond with zones 7, 6, and 5 in the graphic below.)
My goal with the second lamination is to stagger the locations of the scarf joints, so that the joints on lam 1 will be backed by solid wood on lam 2. In doing so, I need to make sure that the scarf joints of lam 2 do not wind up directly over the frames.
 |
| The forward strip of lam 2, fitted & clamped onto lam 1. The 2nd strip is shown loosely in position. The joint between the two will have to be located forward of Frame #5-1/2. |
 |
| The 2nd strip of lam 2, clamped loosely into place so that it is centered over the scarf joint of lam 1. |
 |
| The scarf joint between the 2nd strip (shown) and the 3rd strip (not shown) will have to be located slightly aft of Frame #4. |
3. Preparing the scarf joints
According to the Glen L. Witt's book, Boatbuilding with Plywood, the ideal ratio for a scarf joint is 1:12. I found that this roughly corresponds to a 5° cut.
So, I made this cut on a scrap of 2x4 to use as something of a "sled" for my table saw:
Not Swiss-watch precision, but it works.
I made the cuts, and then lay the strips one on top of the other, aligned so that I could sand the surfaces for the best possible fit.
With all that done, I clamped all the parts into position to make sure everything will fit correctly.
 |
| This view shows the aft end of the 2nd strip, before I had made the 5° scarf cut. |
 |
| Location of the forward-most scarf joint, just forward of Frame #5-1/2 |
 |
| (slightly closer view) |
 |
| All the parts clamped into place. |
I may actually need more clamps.
Have a happy and safe Memorial Day weekend.


No comments:
Post a Comment