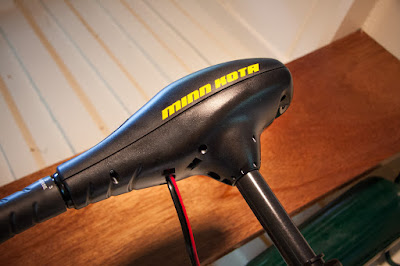
That summer, I was on a long road trip to Kansas City, Missouri. To pass the time while riding in the car, I'd brought along a fistful of fishing magazines. I poured over every page.... looking at photos of all the trophy fish I planned to catch one day, and of course, taking in all the boating advertisements — daydreaming about my ultimate fishing boat & all the stuff it would be decked out with.
That was how I learned about Minn Kota trolling motors.
These days, though my interest in boats has intensified considerably, I'm much less interested in fishing than I was then. However, over the years, every time I've run across the Minn Kota brand or trolling motors in general, it has reminded me of those thirteen year old daydreams... and about how I was going to one day deck out my fishing boat with a Minn Kota trolling motor.
Last week, I finally bought one.
These days, it's my daughter who is much more interested in fishing. Last week, I took her and her brother camping while they were on spring break. We planned to go to a state park with a sizable lake that prohibits gas motors. The park has plenty of aluminum jon boats available to rent. However, they do not provide any propulsion. Visitors to the park are encouraged to bring their own trolling motor and battery, or they can row the boats with the provided paddles.
Now... I've paddled a 14' jon boat loaded with two bored kids into a headwind on that lake before.
I'd prefer not to do it again.
So, I bought the cheapest trolling motor rig I could find, and away we went to the lake. The Endura C2 wasn't terribly expensive, and now I'll have it for our next camping trip.... as well as an alternate motor for Perseverance.
 |
| The Endura C2's 30 lbs of thrust was plenty sufficient to move 3 people in a 14' jon boat around on calm water. I believe it will work just as well, or better, as an alternate motor for the Utility. |
Trailer rewiring completed.
I installed the Optronics submersible trailer wiring kit from Cabela's on the trailer. Installation was simple and straightforward, though the instructions were lacking somewhat for those of us who are unaccustomed to wiring. I used waterproof butt connectors and heat shrink tubing on the tail light connections, rather than the supplied wire nuts.For the amber lights on the side, I used the supplied quick-connect splicing connectors... once I finally figured out what they were. They were not referenced, at all, in the instructions.
Deck stained.
I rolled a thin coat of epoxy over the deck, and squeegied it meticulously. The next step for the deck will be to add a strip of fiberglass cloth down the center, so that the seam will hold together when I attach the deck to the framing. The plywood will need to bend slightly to match the crown of the deck framing, and I want to reinforce the seam beforehand. |
| I used the leftover epoxy to encapsulate the mahogany tabs on the chines. |
...and one more thing:
Yes, I AM still working on the Zip, although at a much slower pace. I've drawn out the transom on a piece of Meranti plywood. I'm planning to construct the transom a little differently than how it's outlined in the plans.... but more on that later. |
| Zip transom drawn, waiting to be cut. |
Current Status of Zip Parts
| |
| Part | Status |
| Stem & Breasthook Assembly | Most surfaces have 1 coat of epoxy |
| Frame 5-1/2 | Forward face has 2 layers of epoxy. Other surfaces have 1 layer. |
| Frame 4 | Side members cut, but have not been planed or notched for sheer. |
| Transom Knee | Coated with 3 layers of epoxy |
| Transom | Side frame members cut 1/4" oversized on outer side. Have not been planed. Transom drawn onto 1/4" BS1088 Meranti plywood. |


No comments:
Post a Comment