Wednesday, December 25, 2019

Fairing, Day 542: Slower than Christmas

Merry Christmas to you!

Fairing work on my Glen-L Zip seems to be taking forever. But then again, I haven't been pushing to finish this phase, and I'm in no real hurry. It'll get done. Who knows, maybe I'll even have some planking on it by this time next year. We'll see. 

In the meantime, let's take a look at where the project is now... with a little help from my Christmas Tree Angel, Charlotte:


Here, Charlotte presides over my test strip of plywood in the portside section I've been working on.

The fitting at Frame #2 is looking pretty good.

There appears to be a small amount of space at the keel. However, that's mostly because the plywood strip is clamped on the farthest side from the camera.

Fitting at the inner batten looks really good!

Fitting at the middle batten is not bad, but could use a little work.

Fitting at the outer batten looks pretty good.

Fitting at the chine is great!

However, a couple of feet back, it's a different story.

Charlotte is not satisfied with the fitting at the middle batten in this area.

She's right. It needs some work. It may even need a shim.
9 And behold, an angel of the Lord stood before them, and the glory of the Lord shone around them, and they were greatly afraid. 10 Then the angel said to them, “Do not be afraid, for behold, I bring you good tidings of great joy which will be to all people. 11 For there is born to you this day in the city of David a Savior, who is Christ the Lord. 12 And this will be the sign to you: You will find a Babe wrapped in swaddling cloths, lying in a manger.” 13 And suddenly there was with the angel a multitude of the heavenly host praising God and saying: 14 “Glory to God in the highest, And on earth peace, goodwill toward men!”

— Merry Christmas! —

Saturday, November 23, 2019

Fairing, Day 510: Port bottom slowly taking shape

The last 14 days have brought about quite a bit of work on the floor battens and the chine around Frame #4. 


To a lesser degree, I've also continued work on the keel. I'm working on the keel slowly and cautiously, because sometimes it's hard to tell just where the trouble spots are. You have to look at it in the context of everything around it.

So, let's get the levels and take a look:


With the 6' level aligned with the transom, the low spot appears to be in the middle. This could mean either the forward area of the keel is still too high, or the transom is too high... or both.


However, when we measure the forward section of the keel, the area from Frame 4 backward to an area just aft of Frame 2 seems... well... relatively flat.


This would lead me to think that the aft end of the keel toward the transom may be a little too high. 

However...

When we align the 4' level with the transom, the keel looks dead-on from the transom to Frame #2.


So, what can we make of all this?

Although I don't have a photo to show it, I measured the area between Frames 2 and 4 with the 4' level. I found a slight high area in the aft 3rd of this section. There also seems to be a slight misalignment with the angle of the bevel in that area of the keel.

I'll work on that area cautiously to get it flattened out, then measure everything again & see how it looks.

Not that I'm an "old salt" at this, by any means... I'll nonetheless repeat my advice on fairing:

"Go slowly, and measure often."

Saturday, November 9, 2019

Fairing, Day 496: Frame #4 essentially done

Day 496; a Saturday. We've reached another minuscule milestone in the fairing. 

The bottom of Frame #4 is, for all intents and purposes, done. It's done enough to use as a reference point for all the other port-side floor battens, in any case. There may be minor adjustments ahead... but they'll be very minor.

Here's where we're at:

We've finally made contact between the chine and Frame #4. There is a tiny little bit of a gap along the aft section of the joint, but this appears to be caused by the angle of the notch that was cut in the frame. I'm not going to pursue that any further down for an aesthetic that will be immediately filled with epoxy and covered with hull planking, anyway.

(Looks like that last sliver of shim is going to stay, after all!)

Port chine at Frame #4.
It's small, but noticeable progress. In the last post, the same joint looked like this...


Moving on, let's take a look at the keel.

I have been proceeding slowly and cautiously with sanding down the high area in the forward part of the keel. When measured with my 6' level, there is still a gap between the middle area of the level and the keel. I believe this gap is showing a little sign of closing up.


For comparison, here's how the gap looked 4 days ago. Maybe it's just my wishful thinking, but it seems slightly improved to me.


I certainly hope that forward part of the keel is close to being right. Here's why. The port junction between the keel and Frame #4 seems just about right. I don't want to take that keel down any further unless it's absolutely necessary.

Here, you can see that the centerline "ridge" on the keel is moving ever so slightly, but more and more, toward the starboard side. Ideally, I'd like to have the center ridge... well... down the centerline of the keel.

Keel at Frame #4.
This is already something of an issue at Frame #2...

Keel at Frame #2
For the center ridge of the "V" in the keel to be physically dead-center down the full length of the keel, it would require everything to be exactly precise. The keel would have to be perfectly straight, and centered perfectly down the exact centerline of the frames. And, the angle of the floor on each side of the "V" would have to be absolutely identical.

Okay... for an amateur boatbuilder constructing only his 2nd boat in the garage... I think we can all agree that kind of absolute precision isn't too likely.

So, my goal is to keep the center ridge as close to the physical center of the keel as much as I can. As this thing takes shape, it's beginning to look like the center of the "V" will be a little offset to starboard. I can live with that, as long as everything is structurally strong in the end.

My gut instinct is that the port side of the floor is set at a slightly flatter angle than the starboard side. So, I measured it to see. I believe I'm right... although the difference is only about 1 degree.

Port side at Frame #4.

Port side at Frame #4.

Starboard side at Frame #4.

Starboard side at Frame #4.
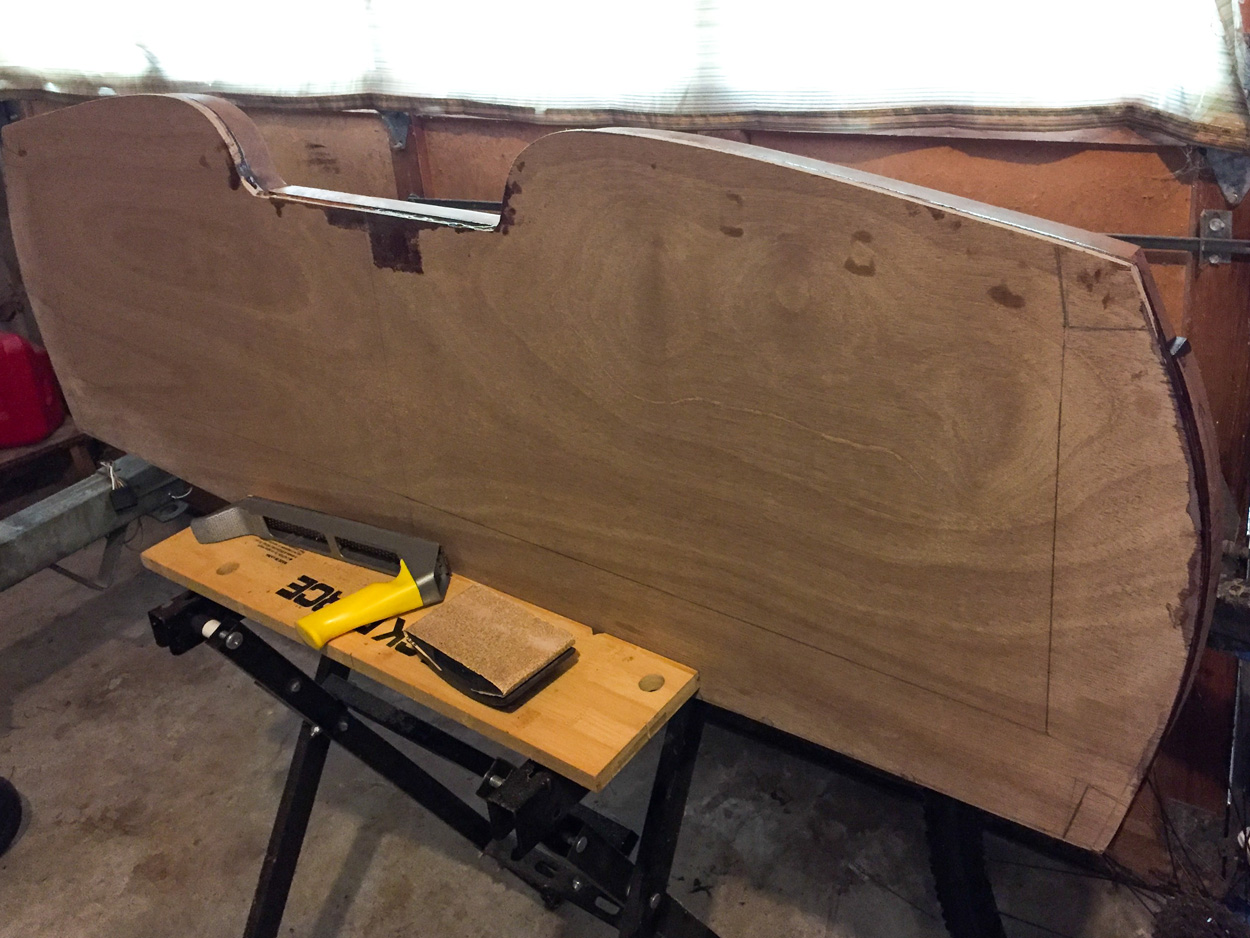
Now that the fairing at Frame #4 is basically done, I'm turning my attention to the floor battens... and still slowly & cautiously bringing down the port side of the keel.

Here, you can see the surface of the outer batten is still rough-cut.

Here, it's a little smoother... but obviously still a LONG way to go.

Middle and inner floor battens at Frame #4.
Alrighty, folks. Thanks for reading. Until next time, God bless.

Tuesday, November 5, 2019

Fairing, Day 492: The Life Span of a Lowly Shim

Day 492. Still working on the port side of Frame #4.

To a lesser degree, I'm still working to flatten that high area on the keel. Slowly.


The fairing work on Frame #4 also clearly foretells that there is much fairing work to be done on the floor battens.


And this is currently all that remains of the  shims I so carefully installed 3 years ago:


(The "before" pictures)...


Oh well. I knew this could potentially happen when I installed them. I still don't regret adding them. I'm no fine craftsman, to be sure... but nonetheless I do want my work to be as accurate as I can get it. If that means adding shims, so be it.

Even if only a sliver remains, if anything at all.

Friday, November 1, 2019

Fairing Diary, Day 488: All Saints Day

Day 488. Happy All Saints Day.

Now, where were we? Let's take a look at that keel:

If we put a 6-foot level on the port side of the keel, and align it with the transom, we'll find that the level is making contact at either end, with a long gap in the middle.


Contact at the transom end

Contact at the forward end
Long gap in the middle


So, how should we interpret this? Let's take a few things into consideration. I have done far more fairing work at the aft end of the keel than in the area between frames 2 and 4. 

At the transom, it's likely that the port side is very, very close to where it needs to be. So, it's not likely that the aft end is a troublesome high point.

Then there's also that problem area at the keel & Frame #2.


Keel at Frame #2
The plane is pretty even along the port side of Frame #2. However, the dip in the middle of the keel also has pushed the center line from the center back over to the starboard side significantly. I believe the problem is mostly a result of the angle being too shallow, but it's also very possible it has been faired too far. A low spot, in other words.

So, if the transom end is about right and the center area is close to right, if possibly low; and knowing that less fairing work has been done at the forward end of our measured area... then it's reasonable to conclude that the forward part of the keel around Frame #4 is too high.


The complication is: fairing the depth and angle of the keel in that area is only guesswork until we know that it is correct at a known point. That known point is Frame #4.

However, to use Frame #4 as a reference point for fairing the keel, we first have to make sure Frame #4 itself is correct.

And so far, it's not.


So, that's what I have mostly been working on.


Frame #4 at the chine, and the outer port floor batten

Middle & inner port floor battens at Frame #4

View from the other side
God bless, and have a great day. And again, Happy All Saints Day.

Monday, October 28, 2019

Fairing, Day 484: Tribulations of a Transom

Finally... another minuscule milestone along our far-flung foray into fairing.

I've finally got the port side of the transom even with the chine. Behold, the glory of it all:


This view...

That view...

And also some good progress along the chine, with the "wrinkles" fore and aft of Frame #2 mostly gone.


brief waste of time down memory lane


The transom for my Glen-L Zip still has a long way to go. But, it has come a long way, too...


From cutting the parts out of rough-cut mahogany

To sanding them smooth, and saving the mahogany dust

To shaping them symmetrically

To the initial cut of the transom knee, and the first layer of 1/4" plywood

To rough-cutting the second layer of plywood

and laminating them together for the first 1/2" piece

To sanding away the Raptor staples

and test-fitting the pieces

and gluing them together


and sanding the transom cutout at 5:00 am

and trimming the top edge

and sanding the faces of the frame pieces

To making the 10° cutouts for the chine and sheers


To the 12° cutout for the keel


To fitting the keel

and fitting the transom knee


and drilling the transom knee

and installing the transom knee

To marking the notches for the floor battens

And making the 12° cuts for the floor battens

and fitting the floor battens

to installing the floor battens

and installing the starboard chine

and fairing the starboard chine

To installing the port chine

and fairing the port chine...

...and fairing the transom to match...
It has been a long journey. But, there is still much, much work to be done.

So, what's next? Currently, I'm back to working on the keel, trying to flatten it out a little more. 

It will get there, too.

Eventually.