The builder of the fourth ship was still fairing the damn thing.
That's precisely what I'm still doing. So, let's talk about those starboard floor battens.
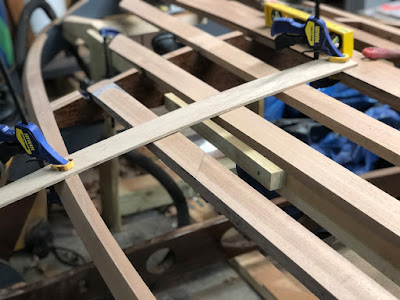
This is where we left off. The 3-section shim was epoxied into place, and clamped up nice and tight. Why 3 sections? Because I had a relatively short scrap that was cut off of one of these battens. So, the width was just right, but it wasn't long enough to do what I needed. So, I ripped it into 3 pieces & glued them end-to-end.
When I pulled all the clamps off, I found I had glued about half of the yellow pads from the Irwin clamps to the wood. It was relatively easy to pull those off, using my scraper for leverage.
After a good bit of planing and sanding, the shim looked like this:
Referring back to the title of this post, the way I try to approach fairing is to go slowly and measure often. It's a slow, laborious, and boring job. Because of that, it's easy to be tempted to rush things. Unfortunately, if you rush things, it will probably result in more mistakes that you'll have to fix.
Easier said than done, trust me.
Here are some photos with my test piece of plywood. I checked the fairing at 1-foot intervals between Frame #4 and Frame #2. The "dip" that I was filling with the shim is pretty much filled. However, there are still some gaps. Apparently, this is a result of high spots on the middle batten and on the chine. I've learned the hard way that whatever you "fix" in one place only creates a problem somewhere else. Go slowly, measure often.
 |
| Fairing at Frame #4. Not bad. |
 |
| About 1 foot aft of Frame #4, we start to see a gap between the test plywood and the outer batten. |
 |
| A closer look at the gap mentioned above. |
 |
| Approximately 2 feet aft of Frame #4, we see the gap getting a bit larger. |
 |
| At 3 feet aft of Frame #4, we see gaps opening up on both the outer batten, and the middle batten as well. |
 |
| Gap on the outer batten. |
 |
| Gap on the middle batten. |
 |
| Fairing at Frame #2. Not bad. |
You guessed it: "Go slowly, measure often."


No comments:
Post a Comment