Saturday, December 22, 2018

Go slowly, measure often.

Do you know why the traditional Christmas carol only refers to three ships, and not a fourth ship that came sailing in.... on Christmas day in the morning?

The builder of the fourth ship was still fairing the damn thing.

That's precisely what I'm still doing. So, let's talk about those starboard floor battens.


This is where we left off. The 3-section shim was epoxied into place, and clamped up nice and tight. Why 3 sections? Because I had a relatively short scrap that was cut off of one of these battens. So, the width was just right, but it wasn't long enough to do what I needed. So, I ripped it into 3 pieces & glued them end-to-end.

When I pulled all the clamps off, I found I had glued about half of the yellow pads from the Irwin clamps to the wood. It was relatively easy to pull those off, using my scraper for leverage.


After a good bit of planing and sanding, the shim looked like this:


Referring back to the title of this post, the way I try to approach fairing is to go slowly and measure often. It's a slow, laborious, and boring job. Because of that, it's easy to be tempted to rush things. Unfortunately, if you rush things, it will probably result in more mistakes that you'll have to fix.

Easier said than done, trust me.

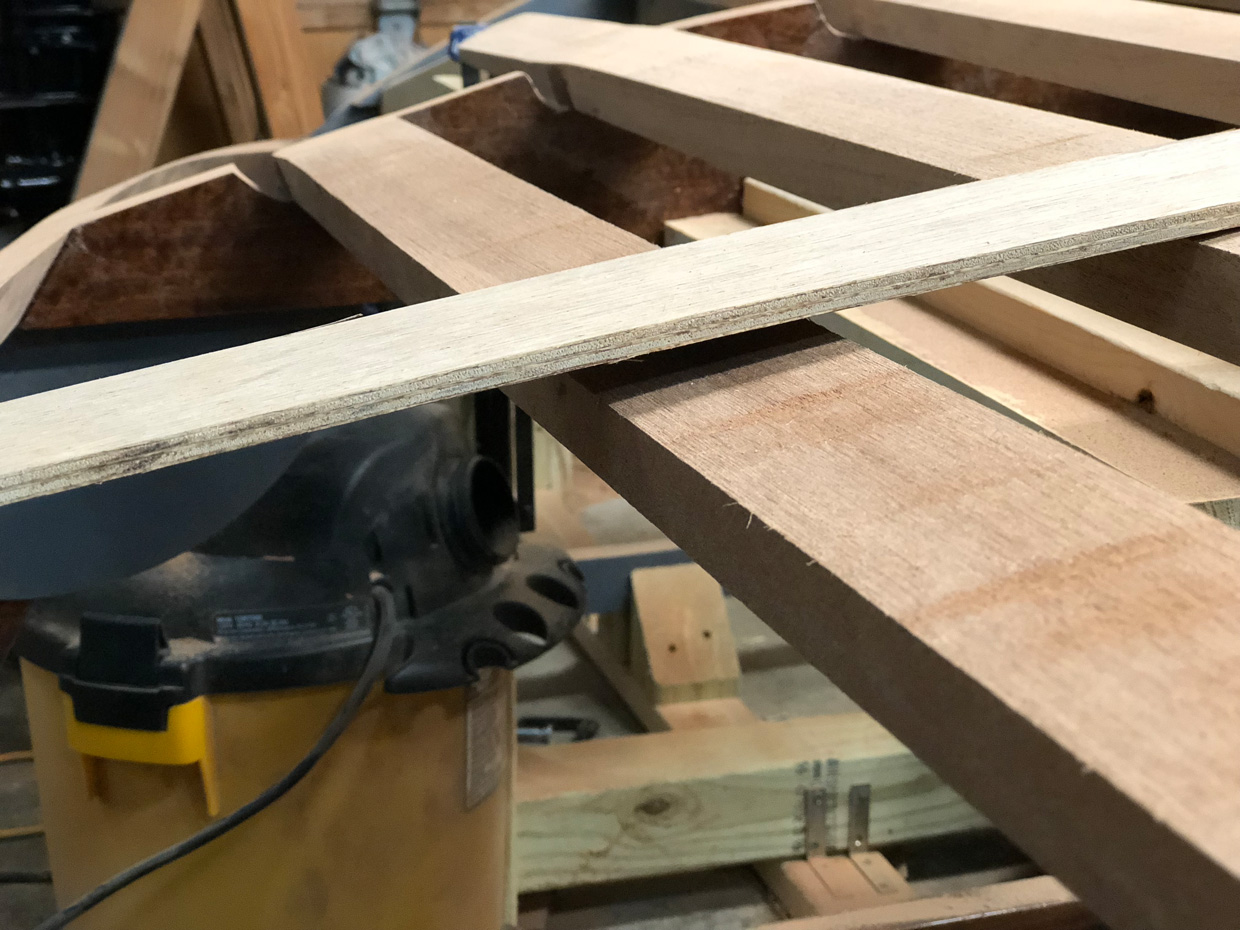
Here are some photos with my test piece of plywood. I checked the fairing at 1-foot intervals between Frame #4 and Frame #2. The "dip" that I was filling with the shim is pretty much filled. However, there are still some gaps. Apparently, this is a result of high spots on the middle batten and on the chine. I've learned the hard way that whatever you "fix" in one place only creates a problem somewhere else. Go slowly, measure often.


Fairing at Frame #4. Not bad.

About 1 foot aft of Frame #4, we start to see a gap between the test plywood and the outer batten.

A closer look at the gap mentioned above.

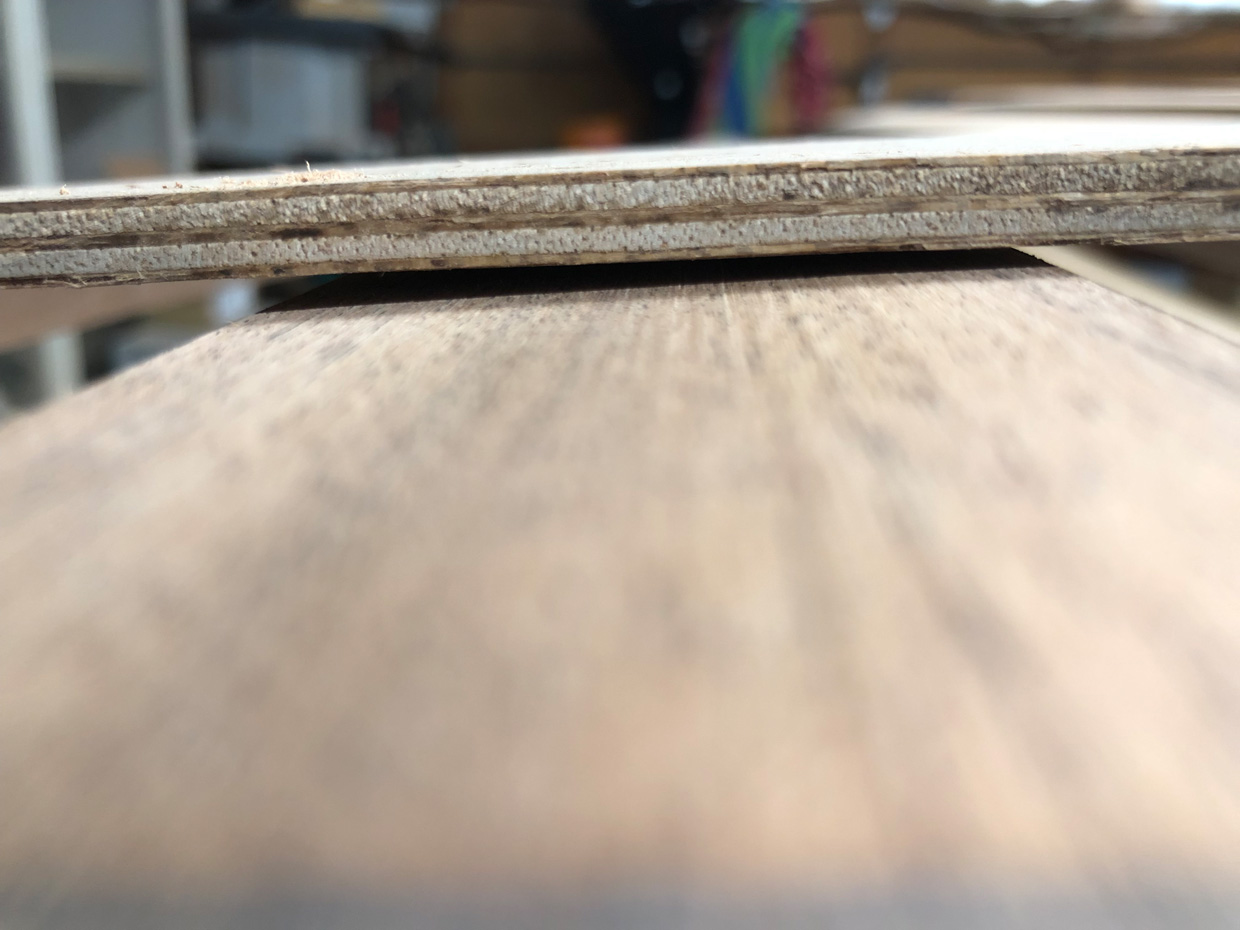
Approximately 2 feet aft of Frame #4, we see the gap getting a bit larger.

Notice how this gap is deeper toward the outside (left) than the inside. I believe the chine is more the culprit here. The rate of rise on the chine from Frame #4 to Frame #2 is not the same as this outer batten.

At 3 feet aft of Frame #4, we see gaps opening up on both the outer batten, and the middle batten as well.

Gap on the outer batten.

Gap on the middle batten.

Fairing at Frame #2. Not bad.
Although I believe high points on the chine are partly responsible for these gaps, I also know the middle floor batten is also a bit high between these two frames. This becomes pretty obvious when I place a 4-foot level on the batten:


You guessed it: "Go slowly, measure often."

Sunday, December 9, 2018

O Shim, All Ye Faithful

December. Christmastime. Boatbuilding. An unusual combination, perhaps... but not to me.


Christmas 2011. Glen L. Witt's book "Boatbuilding With Plywood," and plans for a Glen-L Squirt.

After all, it was during Christmastime that I started on my very first boatbuilding project several years ago... my unfortunately failed attempt at building a Glen-L Squirt. Looking back, it was an odd decision that I made to buy Squirt plans when what I really wanted was the Zip. Oddly, now that I'm building a Zip, I often wish I had simply finished a Squirt. Even though it's minuscule, I believe that line-for-line, the Squirt is one of the most elegant and beautiful boats that Glen L. Witt ever designed.

So, enough reminiscing. The previous post left off with the low spot in the outer starboard floor batten, and the plan to shim it. Come, let us behold shim:


Here it is, clamped into place & the epoxy curing.

Now, on to Christmastime sentimentality:

Sometimes I feel like the Grinch incarnate, because I just can't seem to get into the "Christmas Spirit" anymore. Part of it, without doubt is the sickening over-commercialization of the holiday. It has turned into pure madness. Lately, I've tried to give my Christmas spirit a boost by listening to Christmas songs on the radio... but it just feels so empty. I love all the classics like Dean Martin, Bing Crosby, and certainly Tchaikovsky. But, the other day I noticed that the other classics have virtually disappeared from the airwaves. O Come, All Ye Faithful. It Came Upon A Midnight Clear. Silent Night. What happened to those classics?

O come, all ye faithful
Joyful and triumphant
O come ye, o come ye to Bethlehem

Come, and behold him
Born the King of Angels

O come, let us adore him

Christ, The Lord.

Thursday, December 6, 2018

Big dip in the outer starboard batten

Once again, the title pretty much says it all. There's a significant low spot in the starboard outer floor batten, and it needs to be filled. 

Want more details? Read on...

Here's an updated graphic to help explain some of this stuff. The problem area is located on the starboard outer batten, in "Zone 2" between Frame #2 and Frame #4. The board is a little warped, to put it simply. This warp is creating a low spot on the batten.

Here's my piece of test plywood stretched across Frame#4:


Not bad. Now, here's the test plywood stretched across Frame #2:


Again, not bad. But, now let's take a look at the midway point between Frame #2 and Frame #4:


Yikes. Look closer:


Granted, the fairing isn't done yet. However, if you look at the angle of the batten in the middle of the dip, you'll see this clearly is not acceptable:


The only option is to fill in this low spot. I have the shim pieces cut. Now, I just need to laminate them onto the batten.


Friday, November 23, 2018

Fairing progress on the starboard chine

I'm happy to report that my annual boycott of "Black Friday" has once again been a success. Instead, I spent some time working on the boat, (you guessed it), fairing the starboard chine.

Let's take a look:

First of all here's our graphic for reference...


Now, working our way from front to back, here is the current state of the chine-to-stem connection.


Chine joint at Frame #5-1/2. 


Forward scarf joint. This is on the outer layer of the laminated chine, between Frame #5-1/2 and Frame #4. 


Here's a view of the chine between Frame #4 (foreground) and Frame #5-1/2 (background). 


Chine joint at Frame #4. 


 Chine joint at Frame #4, after a little more fairing. 


Middle scarf joint. This is on the first layer of the laminated chine, between Frame #4 and Frame #2. 


Chine joint at Frame #2. 


Rear butt joint. This is on the outer layer of the laminated chine, just aft of Frame #2. 


Chine joint at Transom. 


While not exactly "long boards," I have been using these drywall sanding blocks. They're just short of 9" long, and I've been using them with sanding belts that I cut in half. They work great, and with 36 grit sandpaper, they remove a lot of wood in a hurry. 


Sunday, November 11, 2018

Armistice Day.

Today is Veterans Day — or, as it was known before 1954 in the U.S., Armistice Day.

100 years ago today marked the end of the "War to End All Wars." 

If only that had been true.

Of course, there was a second world war only a generation later. That was my grandfather's generation; the generation that lived through the Great Depression and then endured the horrors of World War Two. 

After the war came a period of prosperity in the U.S. It was the golden era of Chris Craft's beautiful wooden boats — a childhood icon of summertime for a whole new generation growing up on the water.

Not all veterans who returned from World War Two came home to jobs and prosperity.

Some came home to the grinding poverty of the Appalachian foothills in the Jim Crow south. They started families, tried to put the war behind them, and continued their struggle to survive.

For my grandfather, those beautiful golden-era Chris Craft boats were nothing but a daydream parked on a showroom floor. 


My mom has told me about going to the boat dealer with him when she was very young. But while my grandfather was assuredly salivating over those mirror-polished mahogany boats, for my mom, these trips were memorable for another reason. It wasn't the boats. It wasn't even getting to go to town.

It was getting to ride in a car.

Not their car, mind you. It belonged to someone else, because they were too poor to own one.

That puts a little perspective on just how much of a daydream it was to imagine zooming around on the lake in one of those Chris Craft boats.

I love those classic wooden boats, and I am thoroughly enjoying the process of building one that was designed in 1954 (by another veteran, I might add). 1954 would have been around the same time as my grandfather was eyeballing boats in a showroom. It was the year that the U.S. Congress changed the name of the national holiday from Armistice Day to Veterans Day.

I've been told that my grandfather at one time wanted to build a boat of his own. I'm not sure why he didn't. The man loved woodworking. But, for whatever reason, he never built one.

In that way, I feel a little bit like I'm getting to live out his daydream on his behalf — a little for him, a little for me perhaps.

It's an opportunity I'm immensely and humbly grateful for. 

Tuesday, November 6, 2018

Starboard chine laminated

The title kinda says it all. So, on to the pictures:

The second layer of the starboard chine was done in 3 sections. Let's call them "aft, mid, and fwd." Here, the aft section is clamped into position as the epoxy cures. 


I have temporarily removed some of the clamps holding the mid section, in order to keep from gluing it down prematurely.


Aft section expoxied into place, clamps removed.


Aft section overhanging the transom. (This end piece is actually a very small shim.)


Aft piece trimmed at the transom.


This photo shows both the mid piece (right) and fwd piece (left) clamped into position. The scarf joint that will join the two is located between Frame #4 and Frame #5-1/2.


My intention was to scarf-join the pieces in-place, (rather than join them first & then attach them.)


This photo shows the mid section, clamped into place where it will overlap the scarf joint of the first chine layer.


This photo shows the mid section clamped into place while the epoxy cures.


As before, I removed some of the clamps holding down the fwd piece to keep from accidentally gluing it down.


Butt joint between the mid section (left) and aft section (right), after a little preliminary fairing.


Mid section attached, with most of the clamps removed.


This photo shows the fwd section, clamped into position while the epoxy cures.


Mid section, where it passes through Frame # 5-1/2.


Scarf joint between the fwd section (left) and mid section (right).


Here's the scarf joint after a little preliminary fairing & sanding.


The laminated chine, where it passes through Frame #4. I used a small piece of scrap as a shim to fill a small gap between the chine and the frame notch.


And, finally — the full length of the laminated chine.